How to use AWS web stacks to deploy a HelloWorld page
AWS web stacks offers different CloudFormation configurations depending on how you want your infrastructure to be set up. The 3 main ways are Elastic Beanstalk, EC2 instances, or Dokku. In this tutorial, we’ve chosen Elastic Beanstalk because it allows us to deploy arbitrary containers and includes autoscaling configuration. It also allows you to use the Elastic Beanstalk CLI and web interface, once things are set up.
We’ll use disco-fred as the name of this application. Feel free to change that :)
Create the stack
Login to the AWS web console
If you’ll want to use an existing SSH key to access things later, first go to the EC2 Key Pair interface and select Import Key Pair to import an SSH public key. (Despite the name, you can just import your public key.)
Click the “Elastic Beanstalk, Without NAT Gateway” Launch Stack button from the README.
That takes you to the first page of the AWS CloudFormation “Create Stack” wizard. The template we chose is prefilled in the final option under “Choose a template”. Click Next.
Most values in the form have reasonable defaults. Make the following changes:
- Stack Name: disco-fred (It’s best to keep this short and sweet. It will be reused across the names of AWS resources created, and sometimes shortened significantly, so make sure it’s distinguishable from other stacks based on the first few characters.)
- Domain Name: disco-fred.example.com (The CNAME does not need to be set up in advance, but the domain itself (e.g. example.com) should be valid and you should have access to the email associated with the domain, as per a WHOIS query)
- Choose 2 different zones for Primary and Secondary Availability Zones
- Secret Key: ****** (Record it, just in case)
- Solution Stack: Go to AWS’s list of “Stacks” and copy/paste the italicized text under ‘Multicontainer Docker 17.09…’
- SSH Key Name: Choose your SSH Key (uploaded in step 2 above)
- DB engine version: 9.6.6 (most recent version of Postgres supported by RDS)
- Password: ******* (Record it, just in case. Note it must be alphanumeric, no punctuation or other funny chars.)
- Backup Retention Days: zero to turn off automated DB backups
- Click Next
On the next page, create a tag (just in case… it will make it easier to find things to delete on tear down.)
- Key: ‘app-name’, Value: ‘disco-fred’
- Click Next
Review everything, then click the ‘I acknowledge that AWS CloudFormation might create IAM resources.’ checkbox.
- click Create
If any errors are reported that don’t let the stack creation start, you can use the Previous buttons at the bottom of the pages to get back to the first page and change parameters. (If nothing seems to happen after clicking Create, you might have to scroll back up the page to see the errors.)
Wait, and keep an eye on the email account associated with the domain you chose, because you’ll have to approve the AWS certificate, otherwise the stack creation will stall. This came pretty quickly after starting the stack creation. Stack creation takes about 30 minutes and you’ll eventually see this:

Open the “Resources” tab of the stack details and make a note of these values:
- ContainerLogs
- EBApplication
Create an application to run on the stack
At this point, you have created an Elastic Beanstalk environment, but no applications are running on it. You can view the Elastic Beanstalk dashboard and see logs in AWS CloudWatch. The next step is to create and deploy a container. AWS Web Stacks creates an Elastic Container Registry (ECR) which is where you will store your containers so that Elastic Beanstalk can see them. They must be tagged in a specific way for this to work properly.
Create a local repo and virtualenv:
~$ mkdir ~/dev/disco-fred
~$ cd ~/dev/disco-fred
~/dev/disco-fred$ git init
~/dev/disco-fred$ mkvirtualenv -p `which python2.7` disco-fred
(disco-fred)~/dev/disco-fred$ pip install awscli awsebcli
Note: It should be possible to use Python 3 for this virtualenv, but it didn’t work for one of the writers (using Python 3.6). In that case eb init silently failed.
The commands above will install the AWS CLI and the AWS Elastic Beanstalk CLI. Read those docs to learn more about them. In particular, if you have never used the AWS CLI on your machine, you’ll have to configure it first. Again, there are more docs in the AWS CLI link, but start by typing
aws configureand then answering the questions.Login in to your ECR via docker. The command
aws ecr get-login --region us-east-1will return a long string, which is a docker command that will log you in. So, put a$()around the command to actually run that command in your shell:(disco-fred)~/dev/disco-fred$ $(aws ecr get-login --region <region>) WARNING! Using --password via the CLI is insecure. Use --password-stdin. Login Succeeded
If you get an error like
unknown shorthand flag: 'e' in -e, the AWS command has included an option that your version of docker doesn’t like. Workaround:(disco-fred)~/dev/disco-fred$ aws ecr get-login --region <region> | sed 's/-e none//' | sh
Create a Dockerfile. If your image is already built and present on your laptop, you can skip to step 4. For this example, I created a Dockerfile with 2 lines in it:
FROM nginx
COPY html /usr/share/nginx/html
… and then created a
html/index.htmlfile that just has ‘Hello World!’Commit your changes to the local repo.
Build the image:
(disco-fred)~/dev/disco-fred$ docker build -t disco-fred .
Get the repository URI (<repo-uri> in the next few commands) from the ECR dashboard.

Tag and push the image to ECR:
(disco-fred)~/dev/disco-fred$ docker tag disco-fred:latest <repo-uri>:latest
(disco-fred)~/dev/disco-fred$ docker push <repo-uri>:latest
Push your application to Elastic Beanstalk
Create a Dockerrun.aws.json file. Copy the example file from the README and make the following changes:
- For “name” you can use anything.
- For “image” use “<repo-uri>:latest”
- For <log group> use the value of ContainerLogs from before.
- For “awslogs-stream-prefix” you can use anything.
- Change “containerPort” from 8000 to 80 (because the nginx docker image we’re using listens on 80, not 8000).
Commit it to your local repo.
Use the
eb initcommand to set up Elastic Beanstalk: Choose the ‘us-east-1’ region and the ‘disco-fred-XXXXX’ application, when prompted:(disco-fred)~/dev/disco-fred$ eb init
This creates an .elasticbeanstalk directory in your repo, but doesn’t push anything to AWS.
Deploy:
(disco-fred)~/dev/disco-fred$ eb deploy
This pushes your Elastic Beanstalk configuration and your Dockerrun.aws.json file to AWS and begins the deployment. You should see some output in your command line console and you can also watch events in the Elastic Beanstalk web dashboard.
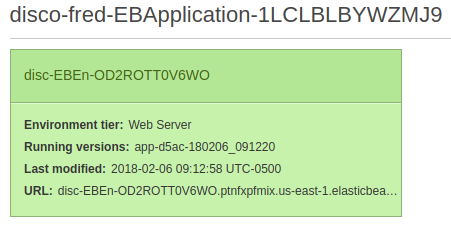
View your application. From the web dashboard, linked just above, click on the URL:
If the environment doesn’t turn green (hopefully within a few minutes), there could be a problem in your Dockerrun.aws.json file. If you edit it, be sure to commit any changes to it, before trying to deploy again.
Once your env is green, point a DNS CNAME entry at that URL.
Steps to deploy new changes
- Update your Dockerfile, other parts of the application code, or the Dockerrun.aws.json file and commit any changes.
- Re-build your docker image.
- Tag your new docker image.
- Push your new docker image to ECR.
- Deploy your local repo to Elastic Beanstalk.
Altogether, steps 2-5 are:
(disco-fred)~/dev/disco-fred$ docker build -t disco-fred .
(disco-fred)~/dev/disco-fred$ docker tag disco-fred:latest <repo-uri>:latest
(disco-fred)~/dev/disco-fred$ docker push <repo-uri>:latest
(disco-fred)~/dev/disco-fred$ eb deploy